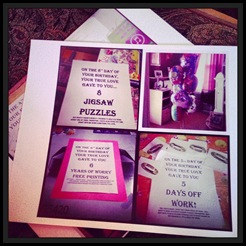
I love me some Instagram. It’s a super quick way to get delicious photos from my phone in pretty much no time at all and I look like I know what I’m doing with a camera. My only beef with the app is that I have to send my photos off with some other app to be printed… not so instantly. Printing them with my regular one-hour service is not an option (at least not yet) so I decided I need to learn to do this myself. And why not share my newfound knowledge with someone else whose as impatient as I am? I’m sure there’s someone else out there…
In this tutorial I will show you how I print my Instagram photos at home using Paint.net and my inkjet printer. I’m gonna go ahead right now and say that this may not be the best way or the easiest way, but it’s my way. ![]() So back off all you geeky photo printing nerds. These will be 4 x 4 inch prints. You will be printing 4 photos to a page.
So back off all you geeky photo printing nerds. These will be 4 x 4 inch prints. You will be printing 4 photos to a page.
First, save the Instagram photos from your camera roll you want to use with new names in a new folder called Instagram prints. This will just make them easy to find.
Next, in Paint.net,
- File> Open> (your first Instagram photo)
- Edit> Select All
- Edit> Copy
- Close that print. You don’t want to mess it up by accident!
- Edit> Paste into new image
- Image> Resize> under Print Size, change the width to 4 inches. The height should also change. Then select OK.
Now, we’re gonna let that photo sit there. Repeat Steps 1 – 6 for three more Instagram photos. You should now have 4 photos in the top right corner of Paint.net.
In Paint.net,
- File> New> under Print Size, change the width to 8 inches. This time you will need to also change the height to 8 inches. Select OK and a new blank white image should appear.
- Now in the right side of Paint. net, select that first photo you opened by clicking on it. It should be outlined in blue and also appear on the main work area.
- Edit> Select All
- Edit> Copy
- Select your new 8 x 8 photo in the top right again, Edit> Paste into new layer
- Your first photo should appear in the top left corner of this image. You can click on it now and drag it to the bottom right hand corner. Line it up right on the edge.
Repeat Steps 2 – 5, with your other three photos. When you add your second and third photos into the 8 x 8 image, move it them to the other two corners of the image. Your fourth image should be set in place when you paste it in.
Remember, if you accidentally click something you shouldn’t, you can undo it with the Undo arrow on the toolbar or by selecting Edit> Undo.
Also, if you need to adjust a photo after you’ve placed other photos into your 8 x 8 canvas, you can also do that using the Layers toolbar. Select Window> Layers. Highlight the layer you want to adjust in blue and adjust it accordingly.
Save your new 8 x 8 canvas with a unique file name as a .jpg and print like you would any other. Be sure to use good quality photo paper and use 100% sizing in your printer settings.
Voila! Instant Instagrams!
Hope this was helpful!
-knittingprose