Today I started on a new project and I realized that I’ve developed a system to starting a new project. That got me wondering about how other people prepare for their projects. So today, I’m sharing with you my process for prepping a new papercraft project and my “must have” items that I need and use for every project. I hope you will share your best tips with me too!
The papercraft project
 With every project, I have some sort of plan. Whether it’s a tutorial, a cutting guide, or just some random notes scribbled on a piece of paper, these are essential and have a prominent place at the crafting table. If I have a cutting guide, I will print this out. If the tutorial involves a diagram of some sort, I will print that as well. (More on that in a minute.) Generally, if I’m working from a tutorial, I use my tablet for reference rather than printing out the tutorial. With page counts ranging from 30 to 150 full color pages, this would get expensive to print not to mention take up a ton of valuable space. The tablet is essential. Also, I frequently use videos for reference as well. My tablet is awesome because it can split screen apps giving me the ability to view both my tutorial and video at the same time. Super handy!
The work space
 My crafting space is about 2’ x 5’ of table space (my husband crafts on the other half). Really it’s an MDF table top my husband made atop two cubed shelving units. I keep the top covered with brown paper so that it can be easily and quickly replaced. I just buy rolls of brown paper from Dollar Tree for covering the top and this works very well. It’s super cheap and pretty durable. This is the first item I will check and replace if necessary when starting a new project.
The craft mat is front and center in the crafting area. It protects the table top from damage and provides a quick reference for measurements. This mat is magnetic and is 15” x 18”, plenty of room for the bulk of my work.
This drink and trash caddy is another ‘must-have’ item that stays at my work station. I’ve had this thing for years and I use it with every project. I always have a drink at my table and every crafter knows you do NOT put drinks on the craft table. haha But even more essential is a place to throw all those score tape backing strips! Those things pile up very quickly and can leave your table space a constant mess if you don’t to something with them. This little trash bag will hold a surprisingly large amount of scraps. I probably only change it twice during any given project.
Next up is the Ikea cart. This thing is always by my side at the crafting table. It holds all my essential tools and any specific items I need for the current project.
And lastly, I must have my project notebook. This little book is where I keep details about all the projects I’ve done. Any corrections, tips, notes about what papers I used – all of this goes into the notebook. I keep this in my cart for quick reference. I can pull it out and jot down a note right there when I remember it. If I wait, I always forget, so this thing has come in handy when I need to note corrections or revisit a project.
The tools

It seems that no matter the project, there are a few tools that I use with every single project. They are:
- ink pen, pencil
- Dritz 3” ruler
- Scotch ATG gun w/ 1/2” adhesive
- Scor Pal double-sided tape 1/2” and 1/4”
- Martha Stewart 12” trimmer
- Fiskars 12” trimmer
- large Teflon bone folder
- glue stick
- Martha Stewart scoring board
- Prima Comfort Craft knife
- Aleene’s Tacky Glue
These are my essentials. They are always on my craft table or right beside me in the craft cart. I’ll go into a little more detail in a later post about some of these.
The materials
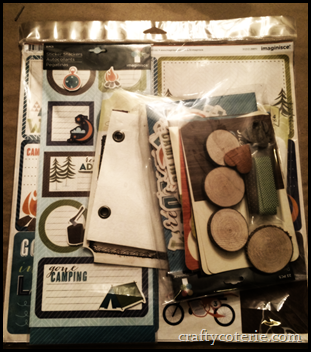
 I really like working from kits if I have the opportunity. It just makes the planning so much easier and it’s nice to not have to think about gathering every piece. BUT kits aren’t always practical or available. Kit or no kit, a list of materials needed is another essential. If I don’t have a list, I make one. Once I’ve gathered all my materials, I don’t usually keep them all out on my work surface. Typically, I start with a giant stack of chipboard and everything else stays in a box. I will put everything I need in the box, from cardstock to embellishments. At each stage of the build, I will pull out the items needed.
The process
At the beginning of every paper crafting project, there are two tasks that must be done.
- cutting lots of chipboard
- preparing paper hinges
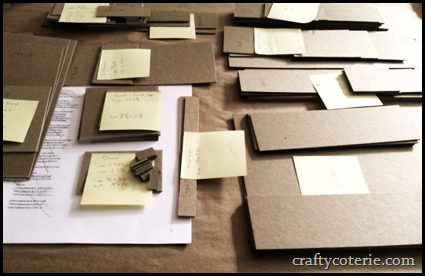
Using my Fiskars trimmer, I work my way through the cutting guide, crossing off pieces as I finish them. The cutting guides are generally broken down into sections. I like to label a post-it note for each section, listing all the pieces as I cut them on the note. Then I stack all the pieces for that section together with the note. Sometimes it’s helpful to clip the loose pieces together as well.

 Preparing paper hinges used to be my least favorite task of all. Now it’s not so bad because I don’t prepare them quite the same as most people. I cut about 8 sheets of 12×12 cardstock into strips and score them down the center. The width depends on the project – anywhere from 1 inch to 1 1/2 inches. Then all of these are scored down the center. In the past, I would to apply Scor tape to every hinge for time’s sake. I do not do that anymore. For me, it’s too much wasted tape. If I cut an inch of waste off of every paper hinge (which is reasonable), at 64 hinges from 8 sheets, I’ve just wasted 64 inches of tape! Scor tape ain’t cheap, y’all. I don’t have the money to be throwing that kinda cash in the trash. Now, if I was making a good deal of money selling tutorials and kits then maybe I’d be fine with it, but on this crafting budget I prefer to cut my hinges to size THEN add tape. Yes, it does add a little more time to the constructing phase, but I’m okay with it.
So that’s basically it. I’m always looking for ways to improve and streamline this process so if you have any tips to offer, please share! What are your essential tools? Are there some good ones I’m missing out on. Let me know in the comments below!