I got to spend a few days in Kentucky with my mom and dad last week canning tomatoes… five bushels to be exact. It was a lot of work, but great fun. I’m ready to do it again.
I decided to document the event so you could see the process we used in canning. I will tell you right off the bat – this method is not a method recognized as safe or correct by the “professionals” (whoever that is), but I can promise you millions of American families have been canning tomatoes this way for generations. My family has canned tomatoes this way for as long as anyone can remember. So far… we’ve not killed anyone. Well, not from canning tomatoes anyway. *ahem* Anyway… on to the tomatoes!
The tomatoes
We didn’t grow any tomatoes this year. Not me. Not my parents. That even feels weird just typing it but for various inexcusable reasons, we just didn’t. Next year though…
My dad did manage to snag our five bushels from a kindly Mexican farmer with three boys for $20 a bushel. I know, right? $20 isn’t bad! We’ve been waiting all summer for tomatoes and last week the call finally came. They are ready now. They’ve got to be picked tomorrow. We can’t wait for the weekend. And boom! just like that, we were in the Yukon with our yummy bento snacks on our way to Kentucky.
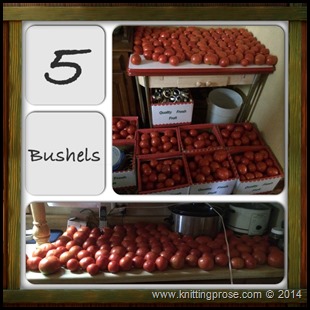
You should have seen the sight we walked in to…
Five bushels is a lot of tomatoes.
We didn’t do any canning the day we arrived. We decided we would start in the morning. I was thinking we would get two or three bushels done the first day of canning then do the last two the next. Yeah, no. We did them all in one day.
The Setup
We used basic equipment for this process. Most everything can be found easily at a local store, I’m sure.
- large bowls, several for washing and cooling tomatoes
- a large heave stock pot
- a wide pot for sterilizing jars
- a smaller pot for sterilizing lids and bands
- cookie sheets for work surfaces
- towels to protect the table tops
- ice cream buckets for holding tomatoes waiting to be cooked
- a sharp knife
- a 5 gallon bucket for dumping skins and cores
- jars with spotless rims
- new lids
- new or used but clean bands
- a jar lifter
- a canning funnel
- a magnetic lid lifter
- a teaspoon (for quarts)
- a 1/2 teaspoon (for pints)
- canning salt
- slotted spoon
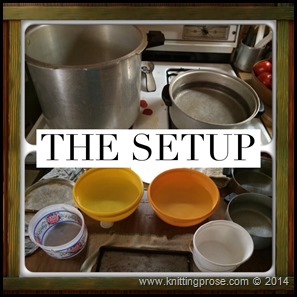 The counter near the sink, we cleared for bowls of tomatoes ready to be blanched. The stove was prepped with a pot of boiling water for blanching and a large stock pot for boiling quartered tomatoes. At the table we placed cookie sheets on top of towels to catch the mess of juice, skins, and cores. We placed bowls of cold water at the center of the table for the cooling tomatoes and an ice cream bucket at the side of each work station for catching all the quartered tomatoes.
Near the table on the floor stood a 5 gallon bucket for dumping the scraps.
The process
Like I said earlier, this is not the “proper” way to can tomatoes, though I would argue it’s one of the more traditional ways.
*Can at your own risk*
If you choose to use the same method I use as described here in this blog, you assume all responsibility for the outcome. This is NOT an instructional post. For precise instructions on canning tomatoes, try this book.
The basic process for canning tomatoes we use goes like this:
- wash tomatoes
- blanch tomatoes
- remove skins, cores, and bad spots
- quarter tomatoes
- boil tomatoes
- sterilize jars, lids, bands
- fill jars
- add salt
- clean rim
- apply lid and band
- let sit for 24 hours and listen for the “pops”
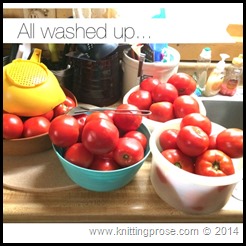 Washing tomatoes
The very first thing we did was get the tomatoes clean. We filled a sink with water, added a bunch of tomatoes, and got all the dirt off. A quick rinse and transfer to a clean bowl, the first batch is ready for blanching.
Blanching the tomatoes
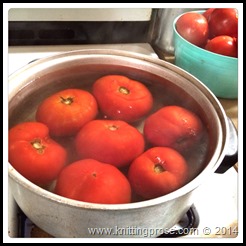
Blanching the tomatoes makes it much easier to remove the peels. We set a good sized pan of water to boil and add a few tomatoes at a time. In just a few seconds the peels loosen from the fruit and they are ready to be removed. Using a slotted spoon we transfer the tomatoes to a bowl of cold water and let them cool down a bit.
Removing the skins, cores, and bad spots
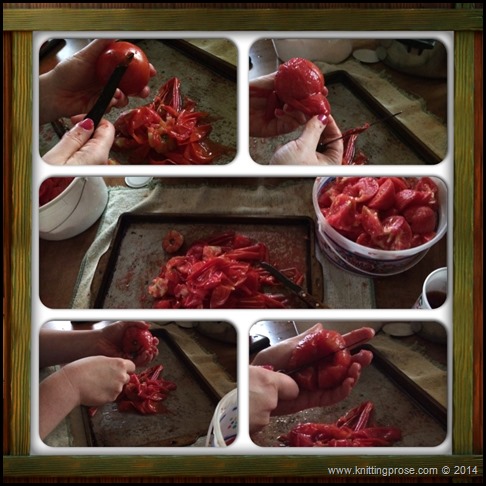
After the tomatoes cool a little, it’s time to remove the skins. I like to cut a small slice in the bottom of the tomato and peel them towards the core. At this point, I cut any bad spots off that are on the tomato. My family laughed at me all day because I tend to smell any tomato that I’m unsure about. It I feel an extra soft area or after I cut out a bad spot, I will almost always smell the fruit to make sure all the bad is gone. After smelling a ton of tomatoes, you catch on to what’s normal and what’s not. Next, I cut the core out, removing all the tough, white areas.
Quarter the tomato and add it to the pot.
Cooking the tomatoes
After a bushel of tomatoes have been prepared, we cooked them in a large heavy pot. You want them to boil up for twenty minutes or so. The tomatoes will break down as they cook and make lots of juice. The tomatoes will scorch and stick to the bottom if left to boil, so we kept them stirred every few minutes. While the tomatoes cooked, we prepared the jars for filling.
Preparing the jars, lids, and bands
It’s very important to have clean, sterilized jars. One technique I like to use is keeping the jars in the oven at 215 degrees after they’ve been washed. This time we just boiled the jars, lids, and bands a few at a time as we filled them. Another very important item – being certain all the jars have clean, solid rims with NO chips. In order to get a tight seal, a perfect rim is a must. We checked all our jars before we started the process. We put two pans of boiling water on the stove – one for the jars, one for the bands and lids.
Filling the jars
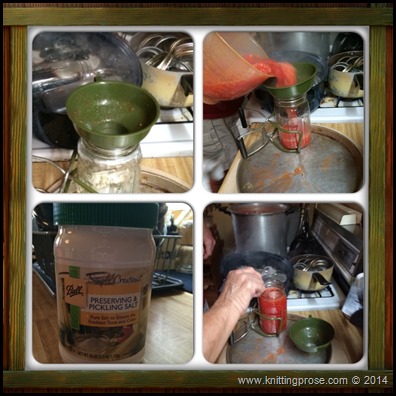
This step is made a little easier by a few small tools.
#1 – a canning funnel
#2 – a jar lifter
#3 – a magnetic lid lifter
#4 – a large Tupperware 8-cup measuring cup
We take a jar out of the water, place the funnel in the mouth of the jar, and fill it with tomatoes using the large measuring cup. It’s good to leave some room in the top of the jar to give it room to seal. We remove the funnel, pour in a teaspoon of salt, and wipe the rim.
After the rim is cleaned off, we used the magnetic lid lifter to grab a lid and place it on the jar. Then we grabbed a band with the magnet and screwed it on the jar tight enough to hold the seal in place, but not too tightly. Finally, we set the jars on a towel-covered table to sit for 24 hours. Usually, within a matter of 10, 15 minutes the popping starts. As the jars cool down, the pressure decreases inside causing the center of the lid to become concave with a “pop”. This creates a tight seal and if the jars do not “pop” or the lid does not sink in the center, it most likely did not seal properly. If this happens, it doesn’t mean the tomatoes are bad, just that they need to be kept in the refrigerator and eaten soon. All of our jars sealed well.
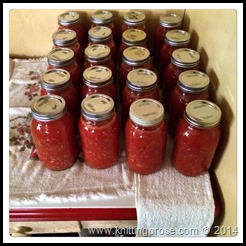
Take a look at all those tomatoes put up for the winter!
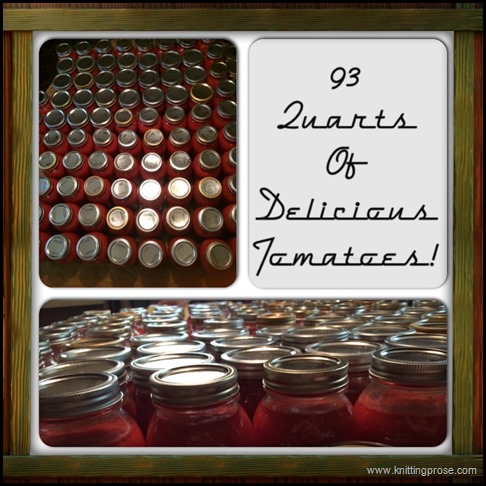
We got a decent yield out of this batch. We had one large bowl full of tomatoes that we didn’t can. Generally, you get about 18 – 20 quarts per bushel so I think we did fairly well.
I could eat canned tomatoes each and every day so we’ll see how long my 40+ jars last. I’m not positive I’ll make it through the winter!
How about you? Do you put up any veggies for the winter months? If so, leave me a comment below and tell me what you put up and the methods you use.
Fascinating, Sara! I knew that my mom had canned tomatoes a much easier way than the “experts’ way” but couldn’t remember how she did it. Here is my answer! Maybe next year I, too, will be canning ‘maters! 😉
You did great now show us how to can other vegs.thank you
Very good! We had a wonderful time doing this as a family! This is a project that will certainly bring you all closer and bring out your funny side because you have to keep talking so you don’t get bored and want to quit! Thank you for helping and also for sharing this “how to” video with everyone! I to am ready to do it again!
I just open kettle a basket of tomatoes out of my garden, I got 3 quarts, not a full peck of tomatoes. My Mother always open kettle. I have did tomatoes and processed them in the canner but the jars never look full. I look forward to canning more with my sister.
It sure is fun carrying on family traditions, isn’t it? Makes the work much more enjoyable.
I come to your site every year to make sure that I do this process correctly. Thanks.
Wow! I’m so glad this post has been so helpful to you! That’s exactly what I was hoping for – to help others! Thank you very much for visiting.
My mother always skimmed the foam off the tomatoes as they cooked. I was always told that the foam is where the impurities are. So I skim.
I do that as well for my strawberries.
Been doing tomatoes with onions & basil, this method (almost exactly including the 8 cup tupperware measuring cup but minus the salt) for about 40 years as did my mother. Neither of us ever had a bad jar.
Also did jams & jellies the same. I don’t recommend this method to anyone because it is not officially accepted as a safe canning practice.
I can tomato juice using this method. Same general method. Season my tomatoes in pot with green peppers, onion, parsley, basil, oregano, garlic, alot and pepper. Works every time.
For my tomatoes, I use a water bath only because I prefer less liquid. I remove the seeds along with the core. Makes my Italian dishes thicker without adding corn starch.